How to Use Text Functions in Excel

Text Functions in Excel

Text Functions

In my experience, I find that many of my clients do not realize that Excel has many powerful – and easy to use – Text Functions.

Even more amazing, I observe clients spending hundreds of hours and thousands of dollars “re-keying” or “manually editing” text entries that have been downloaded from a Main Frame Computer. If you – or your colleagues – have been doing this, you will want to watch this Excel Video Tutorial.

Categories of Text Functions in Excel

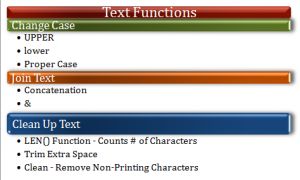
In this Excel video lesson, I demonstrate how to use three categories of Text Functions:

  1. Transform Text – Use the UPPER, lower and Proper functions to change the “Case” of a text string.
  2. Join Text – Use either the CONCATENATE() Function or the & (Ampersand) Operator to join two or more text strings into a single text string.
  3. Clean-up Text – Use the LEN(), TRIM() and CLEAN() Text Functions to “trim the fat” from text strings – especially those that you download from a Main Frame Computer.

Once again, in my experience, I have too many clients contacting me in a panic because they get a REF# error when using Text Functions. I demonstrate how to recover from a “seeming disaster” and also how to use COPY – PASTE SPECIAL – VALUES to transform Formulas into Constant Values.

I welcome your feedback. Please send me an email: danny@thecompanyrocks.com – to let me know if this tip helped you to save time and money. I also welcome your suggestions for future Excel Video Lessons to create and post here, on my website.

Watch This Excel Video Tutorial in High Definition Mode

Follow this link to view this Excel Video Lesson in High Defintion Mode on my YouTube Channel – DannyRocksExcels

Download the Excel Workbook

Follow this link to download the Excel Workbook I use in this lesson.

Learn How to Master Excel in Minutes – Not Months!

If you like this Excel Video Tutorial, I invite you to learn more about the resources that I offer to help you to improve your Excel skill set.
How to Search For and Use Text Strings in Excel

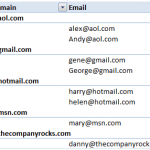
A viewer asked for my help in creating a report that will group his customers’ email addresses by their “domain name.” For example, he wants to be group all customers with gmail addresses . Likewise, his  customers’ yahoo mail, aol.com accounts, etc.

Pivot Table for Email Domains

Pivot Table Email Domains

I immediately decided to use two powerful Excel tools to produce this report:

  1. Text-to-Columns to create two columns (name and domain) from one text value (the email address).
  2. Pivot Table Report to group and present customer emails by domain name.

Both tools work great and I produced the report with only a few mouse clicks!

The response that I got from my viewer was, “That’s great Danny. But …”

It turns out that the viewer wanted to have the Domain Names as the Field Headers and to show each customer’s email address as a row going down vertically in the corresponding field. To give my viewer the report that he wanted, I used these tools and techniques:

  • I returned to the Pivot Table to copy the unique list of domain names.
  • I used Paste Special – Transpose to convert the vertical list of domain names into a horizontal row of Field Headers.
  • I began to build my “Mega-formula” by taking “baby steps” – i.e. I created one formula and then “nested” it inside additional formulas and functions.
  • For the first “baby step” formula I used the SEARCH() Function.
  • Next, I “nested” this formula as the “logical test” inside an IF() Function.
  • In order to “hide” all of the formula error signs, I nested both of these functions inside the NEW IFERROR() Function.
  • IFERROR() was introduced in Excel 2007 and I now consider it to be “indispensable!” This function, alone, makes upgrading to either Excel 2007 or Excel 2010 a “nobrainer” decision!

I enjoy answering questions from my viewers. Many of these questions can be answered from one of the lessons on my DVD-ROM, “The 50 Best Tips for Excel 2007.” For the rest, I try to create a video lesson that demonstrates how to get the answers that you – my viewers and customers – are looking for.

Keep your questions and suggestions coming! I enjoy receiving feedback from you!

I invite you to subscribe to my RSS Feed on Feedburner to be automatically notified whenever I publish a new Excel Video Tutorial.

Watch this Excel Video in High Definition on YouTube

Here is the link to watch this video on my YouTube Channel – DannyRocksExcels

How to Convert from Military to Standard Time in Excel

Viewers and clients frequently ask me how to convert times displayed as military time (1700 hours) to standard time (5:00 PM). Many conpanies capture time using the 24 hour clock (military time) however, many end-users, particularly in the United States want to see time expressed as standard time with AM and PM designations. 

Time on Clock

Digital Time

Time Stored as Text Value or as a Number?

The first step in the conversion is to determine how the time value is “stored” in Excel. Is it stored as a “text value” or is it stored as a numeric value? This will determine how we convert military time to standard time. In this lesson, I demonstrate how to extract text characters, join text strings and then use the TIMEVALUE() Function in Excel to make this conversion. 

Use Text Functions and the “&” (ampersand)

Next, I use the LEFT() function to extract the two left-most characters from the text string (0100) and the RIGHT() function to extract the two right-most characters. In Excel, you use the “&” (ampersand) to join text strings. When you insert the “:” (colon) between the hours and the minutes, be sure to enclose it inside ” “(double quote marks). 

The TIMEVALUE() Function

In order to perform time elapsed calculations in Excel, you need to have time values “stored” as numeric values. You can use the “visual clue” – to which side of the cell is the time value aligned? Text values align to the left side of the cell; numeric values align to the right side of the cell. After you use the TIMEVALUE() function, be sure to format the numeric time values to meet your needs. 

If you import time values that are “stored” as numbers – they align to the right side of the cell – but are formatted as military time (13:30) all you have to do is change the fomratting to standard time (1:30 PM). 

Follow this link to watch this video lesson in High Definition, Full Screen mode on YouTube. My channel is DannyRocksExcels.

I invite you to subscribe to my video podcast, “Danny Rocks Tips and Timesavers,” available for free on iTunes. Click here to view my videos at the iTunes store.

Visit My New Online Shopping Website

I invite you to visit my new, secure shopping website – http://shop.thecompanyrocks.com – where you can view all of my products and “Learn how to “Master Excel in Minutes – Not Months!”