Essential Excel Skill #2: Selecting Cells Efficiently

Essential Excel Skill #2

Essential Excel Skill #2

Learning how to select cells – and ranges of cells – efficiently,  is an Essential Excel Skill. Here, I demonstrate two tips from my extended length video training resource, “Nine Essential Excel Skills.”

On my DVD-ROM, I devote 13:30 minutes and two separate video tutorials to this skill.  The entire DVD-ROM is nearly four hours in length and it contains 25 individual video tutorials.

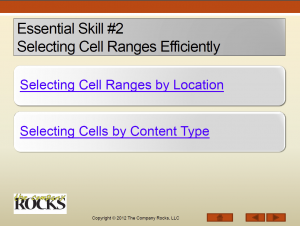
Selecting Cells Efficiently in Excel

For a contiguous range of cells, you can use these methods:

  • Ctrl + A to select all of the cells in the current range.
  • Ctrl + Shift + Directional Arrow to select all of the cells that contain data moving in that direction.
  • Hold down the Shift Key while you tap the directional arrow keys.
  • Press the F8 Key to enter “Extend Mode” and tap the directional arrow keys.

Selecting Cells by Type of Content

One of the most valuable – if underused – tools in Excel is the Go To Special Dialog Box. In this lesson, I demonstrate how to use the Go To Special commands to, first, select all of the cells that contain Numeric Formulas and then all of the cells that contain numeric constants.

As a Best Practice, I always use the Go To Special Dialog Box whenever a  client sends me an Excel Workbook. In my opinion, this is the easiest way to “inspect” an Excel worksheet. I most frequently use Go To Special to find cells that contain:

  • Types of Formulas (Numbers, Text, Logical, Etc.)
  • Types of Constants (Numbers, Text, etc.)
  • Data Validation
  • Conditional Formatting
  • Blanks

Secure Online Shopping Website

I invite you to visit my secure shopping site – http://shop.thecompanyrocks.com/ – to learn more about the many training resources that I offer you.

Watch My Video in High Definition

Follow this link to watch my Excel Tutorial in High Definition on my YouTube Channel – DannyRocksExcels

Share and Enjoy:
  • Add to favorites
  • Facebook
  • Twitter
  • Technorati
  • Print
  • email
  • Digg
  • StumbleUpon
  • del.icio.us
  • Yahoo! Buzz
  • Google Bookmarks
  • Orkut
  • SphereIt
  • Sphinn

Essential Excel Skill #1: Entering Data Efficiently

My latest Excel Video Training Resource is “Nine Essential Excel Skills.” I have published versions for both Excel 2010 and Excel 2007. You can purchase them as either a DVD-ROM that I ship to you; or in a version that you can Download immediately.

Why Nine Essential Excel Skills?

As I created this Excel Video Training Resource, I had two distinct customers in mind:

  1. Everyday Excel users who know that they could get more out of Excel if only they had a structured approach to training that used “real life” business examples.”
  2. Experienced Excel users who want to prepare to take the Microsoft Office Specialist (MOS) 2010 or 2007 Certification Examinations for Excel.


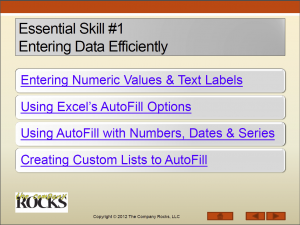
Essential Skill #1 Video Lessons

Essential Skill #1 Video Lessons

Essential Excel Skill #1

I have identified Essential Excel Skill # 1 as “Entering Data Efficiently.” In the world of business there is a common acronym – GIGO – which means, “Garbage In delivers Garbage Out.” In order to produce accurate and meaningful reports in Excel, you MUST begin with data that is entered correctly.

Entering Time and Date Values

In my experience, many Excel users incorrectly enter Time values and Date values. Times and Dates are “Numeric Values.” When Time and Date Values are entered correctly, they align to the right-side of the cell. Once they are entered correctly, you can change their formatting to suit your purpose.

Keyboard Shortcuts for Current Date & Time

  • Ctrl + ; (semi-colon) enters the Current Date into the cell. This creates a “Date Stamp.”
  • Ctrl + Shift + : (colon) enters the Current Time into the cell. This creates a “Time Stamp.”
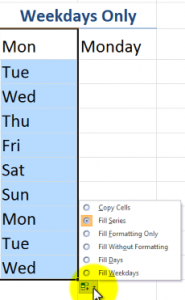
AutoFill Weekdays Only

AutoFill Options – Weekdays Only

Speed Up Data Entry with AutoFill Options

Use AutoFill to quickly – and accurately – fill in the Months of the Year and the Days of the week. I demonstrate – in detail – how to take advantage of the many AutoFill Options that are available. For example, to AutoFill Weekdays Only! I am confident that you will gain many productivity tips from the video tutorials in this Skills chapter.

Fill Series Dialog Box

Many Excel users have never used the “little gem” that is the Fill Series Dialog Box. As you will learn in the video tutorial, you can quickly fill in a long series of numeric values by using the “Step Value” and “Stop Value” fields in this dialog box.

Download the Complete Step-by-Step Instruction Guide – for Free!

I am so confident that you will want to purchase my video training resource, that I am offering you the opportunity to download – for Free! – the 29 page Instruction Guide that is included in “Nine Essential Excel Skills.” Click on the link to begin to download either version as a PDF:

Learn More About My Video Training Resources

My “Master Excel in Minutes – Not Months” series of video training resources is growing quickly! Follow this link to see the resources that are available now!

Watch My Excel Tutorial in High Definition

Follow this link to watch my tutorial in High Definition on my YouTube Channel – DannyRocksExcels

Watch Video Tutorial Now


Share and Enjoy:
  • Add to favorites
  • Facebook
  • Twitter
  • Technorati
  • Print
  • email
  • Digg
  • StumbleUpon
  • del.icio.us
  • Yahoo! Buzz
  • Google Bookmarks
  • Orkut
  • SphereIt
  • Sphinn

How to Highlight Different Values in a Row with Excel’s Go To Special

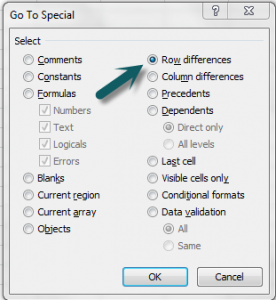
Go To Special Dialog Box

Go To Special – Row Differences

I have published several video tutorials on the topic of Highlighting and Deleting Duplicate Records in Excel. However, a viewer recently asked me how to highlight cells that contain different values in the same Row. This is not as “crazy” as it first seems.

Scenario for this Tutorial

I am trying to determine accurate inventory counts for my product line. I have the count that the computer shows. I also have records from three different auditors who have performed manual counts. I need to easily highlight the cells where the inventory count “is off.” That is where there is a discrepancy between what the computer shows and what a manual count shows.

Go To Special Dialog Box

The commands in the Go To Special Dialog Box are some of my favorite tools. In my experience, I have found that most Excel users have never explored this dialog box.  I think that will change after you watch this video tutorial. For the Row Differences tool, you first select the range of cells that contain your data – beginning with the left-most column. The Row Differences will use this left-most column as the “baseline” and highlight each cell in that row that contains a value that is different from this baseline.

Sorting & Filtering by Color

Beginning with Excel 2007, you can Sort by Color and you can also Filter by Color. After the cells were highlighted with the Row Differences command, I applied a background cell color to each highlighted cell.

Use one of my favorite Keyboard Shortcuts, Ctrl + Shift + L, when working with Filters in Excel 2007 or Excel 2010.

Watch this Excel Tutorial in High Definition

You can watch this tutorial in High Definition on my YouTube Channel – DannyRocksExcels.  Click on this link to watch this video now.

Video Tutorials for Highlighting Duplicate Records

I mentioned that I have published many Excel Tutorials on the Topic of Highlighting & Removing Duplicate Records. Here are links to my tutorials:

Shop for Excel Training Resources

I invite you to visit my secure online shopping website – http://shop.thecompanyrocks.com – to examine and purchase the many training resources that I offer.

Watch My Video Podcasts on iTunes

Click on this link to watch my “Danny Rocks Tips and Timesavers” video podcast on iTunes. – It is free of charge!

 Note: The original Podcast Video did not have the correct video settings. This video has now been updated.


Share and Enjoy:
  • Add to favorites
  • Facebook
  • Twitter
  • Technorati
  • Print
  • email
  • Digg
  • StumbleUpon
  • del.icio.us
  • Yahoo! Buzz
  • Google Bookmarks
  • Orkut
  • SphereIt
  • Sphinn

How to Create a Series of 30 Minute Time Intervals in Excel

How Excel Stores TimeOne of my readers tracks data points at 30 minute (half-hour) periods throughout the day. He asked me for some help in streamlining this process.

AutoFill the Step-value for a Series

You can use AutoFill in Excel to create this series. Here are the steps to take:

  1. In two adjacent cells, enter the beginning time value and the time that is 30 minutes later than the beginning time value.
  2. Select BOTH cells and AutoFill the cells in the range that you want to “populate.”

Calculate Decimal Number that Represents 30 Minutes

You can calculate the numeric value for a half-hour (30 minute) period:

  1. Use a Formula to subtract the Start Time from the End Time.
  2. Format the result as a Number with 6 Decimal Places.

In this case, the result is: 0.020833 which you can use as a Constant Value in a Formula.

Keyboard Shortcut to Enter the Current Time

Ctrl + Shift + : (Colon) will “time stamp” a cell.

How Excel Stores Time

While you can Format Time in a variety of ways, Excel must be able to recognize and store Time entries as Numeric entries! This means that correctly entered times align to the right-side of the cell. Time values are stored as a “decimal part of one” day. For example, 12:00 PM (Noon) is stored as 0.50 – 50% of the day has elapsed

Shop at My Secure Online Website

I invite you to visit my secure online shopping website – http://shop.thecompanyrocks.com – to view all of the resources that I offer you to improve your Excel skills.

Watch Tutorial in High Definition

Click on this link to watch this Excel Tutorial in High Definition on my YouTube Channel – DannyRocksExcels

Share and Enjoy:
  • Add to favorites
  • Facebook
  • Twitter
  • Technorati
  • Print
  • email
  • Digg
  • StumbleUpon
  • del.icio.us
  • Yahoo! Buzz
  • Google Bookmarks
  • Orkut
  • SphereIt
  • Sphinn

How to Create Hyperlinks in Excel

Hyperlink Dialog Box in ExcelOne of my viewers – Ben from the UK – wrote to tell me that he needs to learn how to create Hyperlinks in Excel in preparation for a job interview this week. He asked me that, since he could not find a decent YouTube video on this topic, to create a tutorial demonstrating ow to create Hyperlinks in Excel.

Hey, in these tough economic times, I am happy to help as many people as I can. However, given my time constraints – and, my need to make a living from my video resources – I invite you to purchase one or more of my many resources on my secure online shopping website – http://shop.thecompanyrocks.com

Topics Covered in this Excel Video Tutorial

In this video tutorial, I demonstrate how to:

  • Create a simple Hyperlink to another worksheet in your Excel workbook
  • Create Hyperlinks that “Return you” to your main “Dashboard” worksheet
  • Hyperlink to other programs – e.g. PowerPoint
  • Create hyperlinks that direct a viewer to send you an E-Mail message
  • Hyperlinks to websites

I am the first to admit that the Insert / Edit Hyperlinks Dialog Box is confusing and “too busy” for my tastes. However, in this video tutorial, I demonstrate how to navigate through this Dialog Box and also, how to get te most out of it. For example, how to change the “text displayed” for the Hyperlink while working in the Dialog Box.

Watch  this Video in High Definition

Click here – on this Hyperlink – to watch this video in High Definition on my YouTube Channel – DannyRocksExcels

View this Totorial Now!

Purchase My Resources to improve your Excel Skills

If you are in a similar situation as Ben – where you need to demonstrate specific knowledge of MS Office Programs Skills – why trust your luck? Rather, improve your skills – and your odds for securing a new job or a promotion!

I invite you to purchase one or more of my down-to-earth video tutorials. Visit my secure online shopping website – http://shop.thecompanyrocks.com

Share and Enjoy:
  • Add to favorites
  • Facebook
  • Twitter
  • Technorati
  • Print
  • email
  • Digg
  • StumbleUpon
  • del.icio.us
  • Yahoo! Buzz
  • Google Bookmarks
  • Orkut
  • SphereIt
  • Sphinn

Excel Keyboard Shortcuts for Navigating Between Cells, Worksheets, Documents and Programs on your Computer

Excel Keyboard Shortcuts

Excel Keyboard Shortcuts

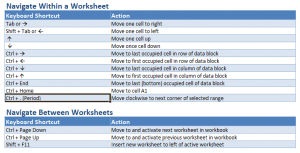
This is the latest installment in my series of Video Tutorials for Keyboard Shortcuts in Excel. This time the focus is on Keyboard Shortcuts for Navigating between:

  • Cells in a worksheet. For example, to move to the last “occupied” cell ( a cell with data) in a column or row
  • Worksheets in the active Workbook
  • Other Excel workbooks or documents that are open on your computer
  • Other programs that are open on your computer

Links to Other Videos in Keyboard Shortcuts Series

Here is the link that will take you to the other Video Tutorials that I have created for Excel Keyboard Shortcuts.

Download the Complete – FREE –  “Chart of Popular Keyboard Shortcuts for Excel.”

There are two ways for you to download – for FREE – My “Chart of Popular Keyboard Shortcuts for Excel:”

  1. Click here to download this – for FREE – at my new, secure online shopping website.
  2. Click here to download this – for FREE – from my Exclusive Membership Content page.

Watch Tutorial in High Definition on YouTube

Follow this link to view this Excel Tutorial in High Definition on my YouTube Channel – DannyRocksExcels

YouTube Tutorial for Excel Keyboard Shortcuts

Share and Enjoy:
  • Add to favorites
  • Facebook
  • Twitter
  • Technorati
  • Print
  • email
  • Digg
  • StumbleUpon
  • del.icio.us
  • Yahoo! Buzz
  • Google Bookmarks
  • Orkut
  • SphereIt
  • Sphinn

How to Create a Summary Report from an Excel Table

Functions for Executive Summary

Functions for Executive Summary

I created this Excel Video Tutorial in response to a viewer who, in her company, is not permitted to use a Pivot Table to create a report. Unfortunately, this happens more often than you might think. Nevertheless, I promised to share my tips and advice. I think that many of this tips will help Excel users at all levels.

Tips Covered in this Video Tutorial

  • Use Advanced Filter to Extract a list of unique customer names from a range with @ 4,300 records.
  • Later in the lesson, I show you how to extract this list to a different worksheet – a tip that will save you time when preparing your reports!
  • How and why to convert a normal range of data into a TABLE in Excel 2007 / 2010 or into a LIST in Excel 2003.
  • How to create “Named Ranges” for your key data cells and to use them in your Formulas and Functions.
  • How to use the SUMIF, AVERAGEIF and COUNTIF Functions in your summary report.

Keyboard Shortcuts Used in this Tutorial

  • Ctrl + T to convert to a TABLE in Excel 2007 / Excel 2010
  • Ctrl + L to convert to a LIST in EXCEL 2003
  • Ctrl + A to open up the Function Arguments Dialog Box
  • Ctrl + Shift + F3 to open the Create Names Dialog Box
  • F3 to open the Paste Names Dialog Box

I decided that I will only make this video available on YouTube – I think that you will enjoy the clarity that you get from the High-Definition / Full Screen Mode.

Watch Tutorial in High Definition on YouTube

Follow this link to view this Excel Tutorial in High Definition on my YouTubeChannel – DannyRocksExcels

Visit my new secure online shopping website

I invite you to visit http://shop.thecompanyrocks.com – my new online shopping website.

Watch Video Now

Share and Enjoy:
  • Add to favorites
  • Facebook
  • Twitter
  • Technorati
  • Print
  • email
  • Digg
  • StumbleUpon
  • del.icio.us
  • Yahoo! Buzz
  • Google Bookmarks
  • Orkut
  • SphereIt
  • Sphinn

Keyboard Shortcuts to Enter and Edit Data Efficiently in Excel


Keyboard Shortcuts to Enter Data

Keyboard Shortcuts to Enter Data

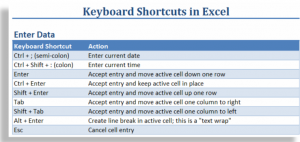
This is the latest installment in my series of video tutorials where I demonstrate how to use Keyboard Shortcuts in Excel. In this tutorial, I demonstrate how to Enter and Edit Data Efficiently in Excel using Keyboard Shortcuts.

Tips Covered on Video Tutorial

Here are the main Keyboard Shortcuts that I show you how to use on this video:

  • Enter Current Date in a cell.
  • Enter Current Time in a cell.
  • Use Ctrl + Enter to accept data entry and keep the focus on the current cell.
  • Use Ctrl + Enter to populate a range of selected cells.
  • Use Alt + Enter to “Wrap the Text” in a cell.
  • Use F2 to edit data inside a cell.
  • Use Ctrl + left & right directional arrows to move to the beginning of the next / previous word while editing in the cell.
  • Use ‘ (apostrophe) as the first character in a cell to make this a “text” entry.

Download my complete Chart of Popular Keyboard Shortcuts as a PDF 

 Follow this link to download – for free – my 5 Page Chart of Popular Excel Keyboard Shortcuts as a PDF.

Subscribe to my Video Podcast on iTunes

Here is the link to subscribe to my video podcast, “Danny Rocks Tips and Timesavers” on iTunes. It is offered for free!

Watch Tutorial in High Definition on YouTube

Follow this link to view this Excel Tutorial in High Definition mode on my YouTube Channel – DannyRocksExcels

Share and Enjoy:
  • Add to favorites
  • Facebook
  • Twitter
  • Technorati
  • Print
  • email
  • Digg
  • StumbleUpon
  • del.icio.us
  • Yahoo! Buzz
  • Google Bookmarks
  • Orkut
  • SphereIt
  • Sphinn

Excel Keyboard Shortcuts to Fill a Series

Here is the latest installment in my series of video tutorials on Keyboard Shortcuts in Excel. In this lesson, I demonstrate how to Fill a Series with Values or a Formula Down or to the Right.

The more interesting Keyboard Shortcuts that I demonstrate in this lesson are:

  • Ctrl + ‘ (apostrophe) – to copy the value from the cell directly above; to copy the formula from the cell directly above while retaining exact cell references.
  • Ctrl + Shift + ” (double quote) – to copy the value from the cell directly above; to copy the “result” of the formula from the cell directly above.

Download My Free “Chart of Popular Keyboard Shortcuts in Excel”

Watch Tutorial in High Definition

Click here to go to my YouTube Channel – DannyRocksExcels – where you can watch this tutorial in High Definition mode.


Share and Enjoy:
  • Add to favorites
  • Facebook
  • Twitter
  • Technorati
  • Print
  • email
  • Digg
  • StumbleUpon
  • del.icio.us
  • Yahoo! Buzz
  • Google Bookmarks
  • Orkut
  • SphereIt
  • Sphinn

Excel Keyboard Shortcuts to Hide, Unhide, Insert and Delete Cells, Columns and Rows

Commands in Cells Group

Commands in Cells Group

Here is the latest installment in my series of video tutorials demonstrating how to use Keyboard Shortcuts in Excel. These Keyboard Shortcuts perform actions that you find in the Cells Group of commands on the Ribbon in either Excel 2007 or Excel 2010.

Topics Taught in Video Tutorial

Here are the topics that I teach in this tutorial. Using Keyboard Shortcuts to:

  • Select all cells in current row(s) Shift + Spacebar
  • Select all cells in current column(s) Ctrl + Spacebar
  • Open Insert Dialog Box Ctrl ++ (plus)
  • Open Delete Dialog Box Ctrl + – (minus)
  • Open short / contextual menu Shift + F10
  • Hide current row Ctrl + 9
  • Hide current column Ctrl + 0 (zero)

Download My “Chart of Popular Keyboard Shortcuts for Excel”

Click here to go to my Exclusive Membership Content page and download my charts of keyboard shortcuts. They are free to members who register.

Watch Video in High Definition

Follow this link to view this tutorial on my YouTube Channel – DannyRocksExcels

For some strange reason, I could not produce this video for my Podcast. So, the only way to view it is on YouTube.

Puchase My DVD-ROM

If you enjoy these tips. If you enjoy my style of instruction. Then, you will really benefit from purchasing and learning from my best-selling DVD-ROM, “The 50 Best Tips for Excel 2007.” 

Follow this link to learn more about my DVD-ROM and to open a Secure Shopping Cart to make your purchase.

Share and Enjoy:
  • Add to favorites
  • Facebook
  • Twitter
  • Technorati
  • Print
  • email
  • Digg
  • StumbleUpon
  • del.icio.us
  • Yahoo! Buzz
  • Google Bookmarks
  • Orkut
  • SphereIt
  • Sphinn